Showing posts with label Barry M. Show all posts

Friday, 28 February 2014

February Favourites.

Hi there! So, it is the last day of February, so at college it is getting more intense and drawing ever closer to the end of the year and the end of college for ever! Although I might be freaking out about my life after college, or college in general I have managed to find a few things that I have loved throughout February and thought I would share them with you.

The first thing I have been loving is a lip balm. Surprise, surprise. I have heard about Carmex and have been told it is really good but I have never tried it before. So I bought one and I love it so much! It has kept my lips really hydrated and it makes my lips tingle and I love that feeling so much.


The second thing I have been loving is any Barry M product. If you have read my Nails Monday I use a lot of Barry M nail paints. I love them so much! If you have ever thought about buying a Barry M nail paint get one. I would recommend them so much!


The third thing I have been loving is a American group called Pentatonix. They are an acapella group, which makes all the drums and backing beat from there voices. They are amazing! I was going to go and see them in Manchester but I have no-one to go with and I have college the next day so I would be dead, the next day. I have gotten into them a lot over the past couple of months, so I love them a lot.


The fourth and last thing I have loved this month and will always love it, is Gossip Girl. I am season 3 and have only been watching it for about a month now. I love it so much! So, definitely watch that! You will not regret it.

Have you watched or used any of the things I have loved this month? What have you loved this month? I want to remind you all that as soon as I get to 100 followers on my blog I will be doing a giveaway. Feel free to comment down in the comments. If you need to email me, you can contact me at realdreaming1@gmail.com . Also feel free to follow me on Bloglovin, Twitter, Tumblr, Polyvore and Instagram. See you soon! xx

Thursday, 27 February 2014

A very late Nails Monday #5!

Hi there! So, I didn't do the Nails Monday on a Monday. I am aware of this! But with college drawing to an end I have honestly not had the time to do the blog post! I have loads of work and deadlines to meet, so I did my nail last night and I am planning on doing the rest tonight. So, if you didn't know I am british and the Brits were this past week. I was super happy for One Direction for winning 2 awards and all the other artists. They definitely deserved them and I hope they enjoyed the celebrations. Why/how does this link in with my nails? I hear you ask. Well, my nails this week is a union jack design. I warn you now, I have not took pictures of all the steps and they start off as a bit blurry and then end as quite clear pictures. So here we go!
I'm sorry its so blurry!
So I started off with filing my nails into the shape I wanted and smoothing out any ridges that my nail had. I then applied the Sally Hansen Miracle Cure to my nails. (I will be doing a review on this nail polish very soon.) After that had dried very quickly, I used the Gelly Shine Nail Polish from Barry M in the colour Blood Orange in 347, to paint a cross over the whole nail. As you can see. The only tool I used for this is the brush end of my nail tool.

After I had done this, I got the Barry M nail paint in Matt White in 66. I outlined the red lines I had already painted onto my nails. Then I got the Gelly Shine Nail Polish that I used before and painted on 4 diagonal lines from each corner of the cross in the middle of the nail.


After I had painted that on, I outlined the new red lines with the white nail polish again. After all of that had been done, I got the Gelly Shine Nail Polish from Barry M in the colour Blue Grape in 402. In the spaces that had no colour on, I filled in with the nail polish as the blue on a Union Jack Flag. Even if I do say so myself, I think it looks very cute. I have never done this type of nail art before, so this was a first for me as well.

What do you think of this Nail Art? Do you use a lot of Barry M nail polishes? What do you think of the Barry M range? I just want to remind you all that as soon as I reached 100 followers on this blog I will be doing a giveaway! So thank you for sticking by, while I have had the very busy college work week. Feel free to comment down in the comments. If you need to email me, you can contact me at realdreaming1@gmail.com . Also feel free to follow me on Bloglovin, Twitter, Tumblr, Polyvore and Instagram. See you soon! xx

Monday, 3 February 2014

Nails Monday #4!

Hi there! So its Monday which means a Nails Monday yay! So this week I have used lots of different colour nail polishes and a base coat and top coat. This is because this week I am going to a dinner for my brothers birthday, so I decided to paint on little balloons on each nail with different colours for each nail. I used a Rimmel Base Coat and Top Coat and then for each colour I used a Barry M nail polish and then the outline I used a Nails Inc. nail polish. So now I guess I will tell you how I did this.
 

So first, I painted my nails with just white colour after applying the boat coat. I used the Barry M Matt White, 66. I love Barry M as I have said in the past. It stays on very well and doesn't chip easily either. If you have read my other nail Mondays you will see how much I use the Barry M nails polishes and as you can see from the picture I have 5 of them.
 
Then I used my nail tool with I used the brush end for and painted on a circle and then a little triangle as well. For this certain nail I used the Barry M (surprise, surprise) in the colour Blue Grape in 402. For my other nails I used Barry M in the colours Mango in 329, Blood Orange in 347, B in 329 and then a No7 in the colour Blackberry in 60.
 
Then I used a Nails Inc. in the colour New York Noir. I then outlined the circle and triangle and then did a squiggly line as the balloon string. So I used the brush end again. If you don't have a nail tool, I would highly recommend getting one. You can do so many nail art designs with one, although it does need practice to master/use correctly.
 
After I had done my thumb nail I went on to do my other nails. After that had been done and dried, I painted on a top coat which is a Rimmel one again. I loved doing this nail art design and for me it was so simple. I loved using all the different colours on my nails because just looking at them I love. So if you are ever stuck with choosing a nail polish brand I would recommend Barry M if you can't afford buying Essie or Nails Inc. or OPI. It is a great alternative from the high end products that not everyone can afford all the time.
 
So I hope you enjoyed reading this blog post as much as I enjoyed doing my nails. Do you have a favourite nail polish brand? Do you use any of the colours I used today? Do you like this nail art? Do you have any nail art you want me to try?
 
Feel free to comment down in the comments. If you need to email me, you can contact me at realdreaming1@gmail.com . Also feel free to follow me on Bloglovin, Twitter, Tumblr, Polyvore and Instagram. See you soon! xx

Monday, 27 January 2014

Nails Monday #3!

Hi there! It is Monday so you all know what that means! It's Nails Monday Week Number 3! So today I had to get up at 8 just to return a camera to college on the day that I have off. I went and had some breakfast at Costa. (If you know me that is no surprise at all!) I came home eat half a Lemon Meringue Pie and then slept and started on my nails. The nails I have decided on this week is something that I got from the book The Hunger Games. If you haven't read the Hunger Games I would definitely recommend it but it is a flame design on my nails. I have used the OPI Natural Base Coat, Barry M in the colour 347 in Blood Orange, Barry M in the colour 329 in Mango, Barry M in the colour 329 in B and Nails Inc. in New York Noir. To do this design I have used a Nail Tool.


To start of with I used my Nail Tool to do the red part of the flames. I used the brush end. I started off by doing the outline of the flames. Don't worry if it doesn't look quite right because you can just go back over it with the Black in the next step.
 
 
After I did the red flame part I used the Black Nail Polish to fill in the top part of my nail. I went in between the red flames, corrected any mistakes I made and made it look half presentable seeing as I am not as good at this. I cleaned the brush part of my Nail Tool and used that again.
 
 
After doing this I used the brush part of the Nail Tool again. I dabbed orange and yellow at the bottom of my nail to make it look more like a flame design. I did 2 layers of the Orange and then 1 layer of Yellow and the another layer of Orange on top, so it is all blended in. While each layer of each different colour is partly wet dab on the other colour and then wait til it is partly wet again and do it again. So then it should look like this.
 
 
What do you think about my Nail Art this week? Do you like it? Do you use any of the products I use this week? What do you think about the products if you have used them? Feel free to leave a comment down below. If you have anything that you would want to know or want to ask but don't want to comment don't hesitate to email me at realdreaming1@gmail.com .
 
Feel free to follow me on Bloglovin', Twitter, Tumblr, Polyvore and Instagram. I hope you enjoyed this and I will see you soon!

Monday, 20 January 2014

Nails Monday #2

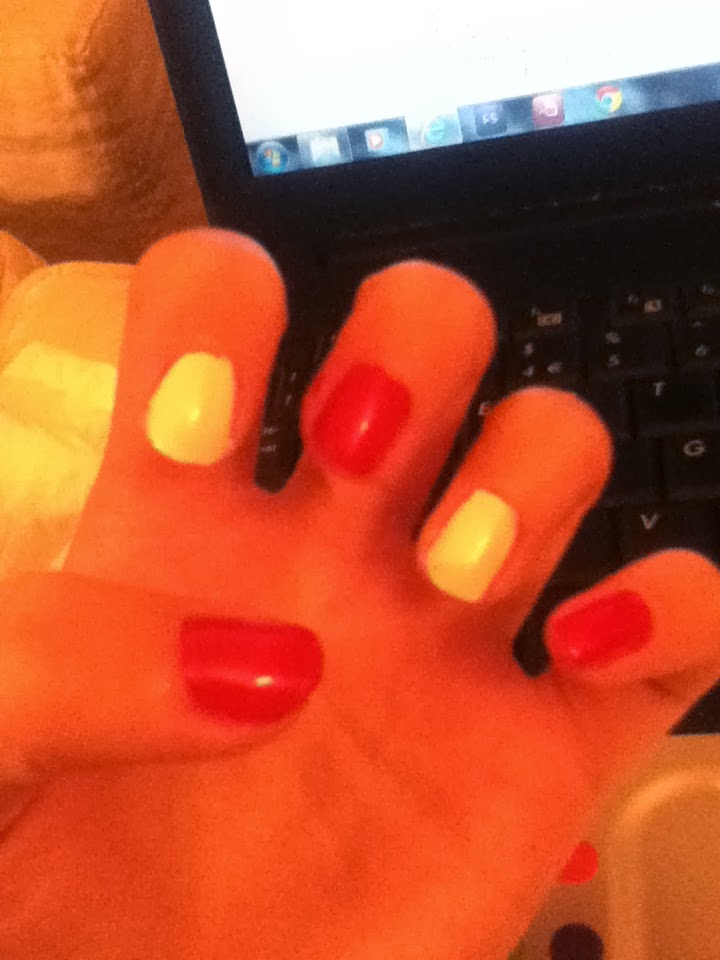
Hi there! So the weekend went by far too quickly containing work and going out. At the weekend I used the velvet effect kit and it didn't work out as well as it could have done. So I took it off this morning and just put on a basic base coat to last me, until I painted the colour onto my nails. This week I used the OPI base coat, Barry M Blood Red 347 and Barry M Matt White 336. The colour on each nails alternates between Red and White. Very basic but adds a bit of colour to any outfit.
 
So first of all, I put the OPI base coat on each nail. This helps not stain the nail with whatever colour I use and protects the nail as well.
 

So then after I had put my base coat on, I put red on every other nail and then on the remaining nails, I put on white. I painted on 2 coats of nail polish so I would get a solid colour on each nail. I used Barry M because it gives great coverage and doesn't chip easily. It also dries very quickly and does not smudge easily either. I love the range of colours, there is to buy from as well. So after I had painted my nails red and white, that's all there is to do for this week.


Sorry that there wasn't much for this post and that the lighting wasn't very good. I promise that I will do my nails and shoot pictures during day light rather than late at night. Do you have a colour of nail polish you can't live without? Do you like my nails this week? Do you have any Barry M products? Feel free to comment down below.
 
Feel free to follow me on Bloglovin', Twitter, Tumblr, Polyvore and Instagram. If you have any questions feel free to email me at realdreaming1@gmail.com . See you soon!

Monday, 13 January 2014

Nails Monday #1!

Hi there! So it's a Monday night and I hope you all had a wonderful weekend, filled with fun. I am off on Mondays if you don't already know and I decided instead of painting them one colour I decided to paint little eyes on them and if I say so myself, I think I did a damn good job! So here are all the products that I used and I will tell you how I did it.
 
 
So first I used the Bourjois Paris Nail Polish Remover to remove the nail polish on that had chipped and I had been wearing for over a week. So after all of that was taken off I decided to paint on a base coat of the OPI Natural Base Coat. Now I know that OPI is quite expensive, so if you want to recreate this nail art any clear nail polish will do, as will any cotton wool and nail polish remover will as well. After I had applied a base coat I applied two coats of a black Nails Inc. nail polish. This nail polish is called New York Noir. I'm not sure if this was a limited edition nail polish or not but I got this in a company magazine back in October/November I can't remember which.
 
 
So after I had applied two coats of that black nail polish I picked up the Barry M white nail polish. The nail polish that I am using is 66 Matt White. Now Barry M nail polish is amazing. It is long lasting and hardly ever chips. I used my nail tool to paint on two ovals as for the whites of the eyes. I did 2 coats for that as well so you don't see the black underneath.


So after I used the brush part for the whites of the eyes, I used the other end of the nail tool to dot on the pupil of the eye. To dot on the pupil I used the same black I used for the main coat of the nail. Nails Inc. nail polish is amazing and hardly ever chips either. I love it so much and I love wearing it on its own or with nail art on top as well.


So after the whole of the eyes are painted on I used the base coat I used as another top coat as well. As I said before any clear nail polish will do as a base coat and top coat. This is so easy to recreate and you can get the nail art tool from an Avon catalogue for £3, which is really cheap compared to nail art brushes in a set which cost a lot. I hope you have liked seeing what I have done to my nails for this week.

Have you done any nail art on your nails? Is there any brand of any colour that you love either on its own or with another colour? Do you like what I did with my nails this week? Feel free to comment down below.

Feel free to follow me on Bloglovin', Twitter, Tumblr and Polyvore. If you want to follow me on Instagram my name is livvy15. I would link it up but my computer doesn't seem to like the website. So my picture on Instagram is the same picture as my profile picture on here. On my Instagram you will see what I'm using on my nails on Mondays and what I'm doing my blog posts about. See you soon!